Moulded candles offer a unique opportunity to express creativity and add a personalised touch to your home decor. With the flexibility to choose from a variety of shapes, sizes, and designs, candle moulds allow both novice and experienced candle makers to craft stunning pieces that reflect their individual style.
Let’s delve into one of the most crucial steps in moulded candle making: how to properly put a wick in a candle mould.
This step is fundamental to ensuring your candle burns evenly and beautifully, making it a pivotal skill in your candle crafting journey:
1. Preparing Your Mould
A. Lubricating the Mould
Before you begin pouring wax into your mould, it's crucial to properly lubricate it. This step ensures that your finished candle can be easily removed without damage. Lightly coat the interior surface of your mould with a thin layer of oil.
You can use a spray oil or a soft brush to evenly apply the oil, covering every nook and cranny.
Be careful not to overdo it – a little goes a long way. For moulds with a removable base, remove it before oiling to avoid any mess on the wick.
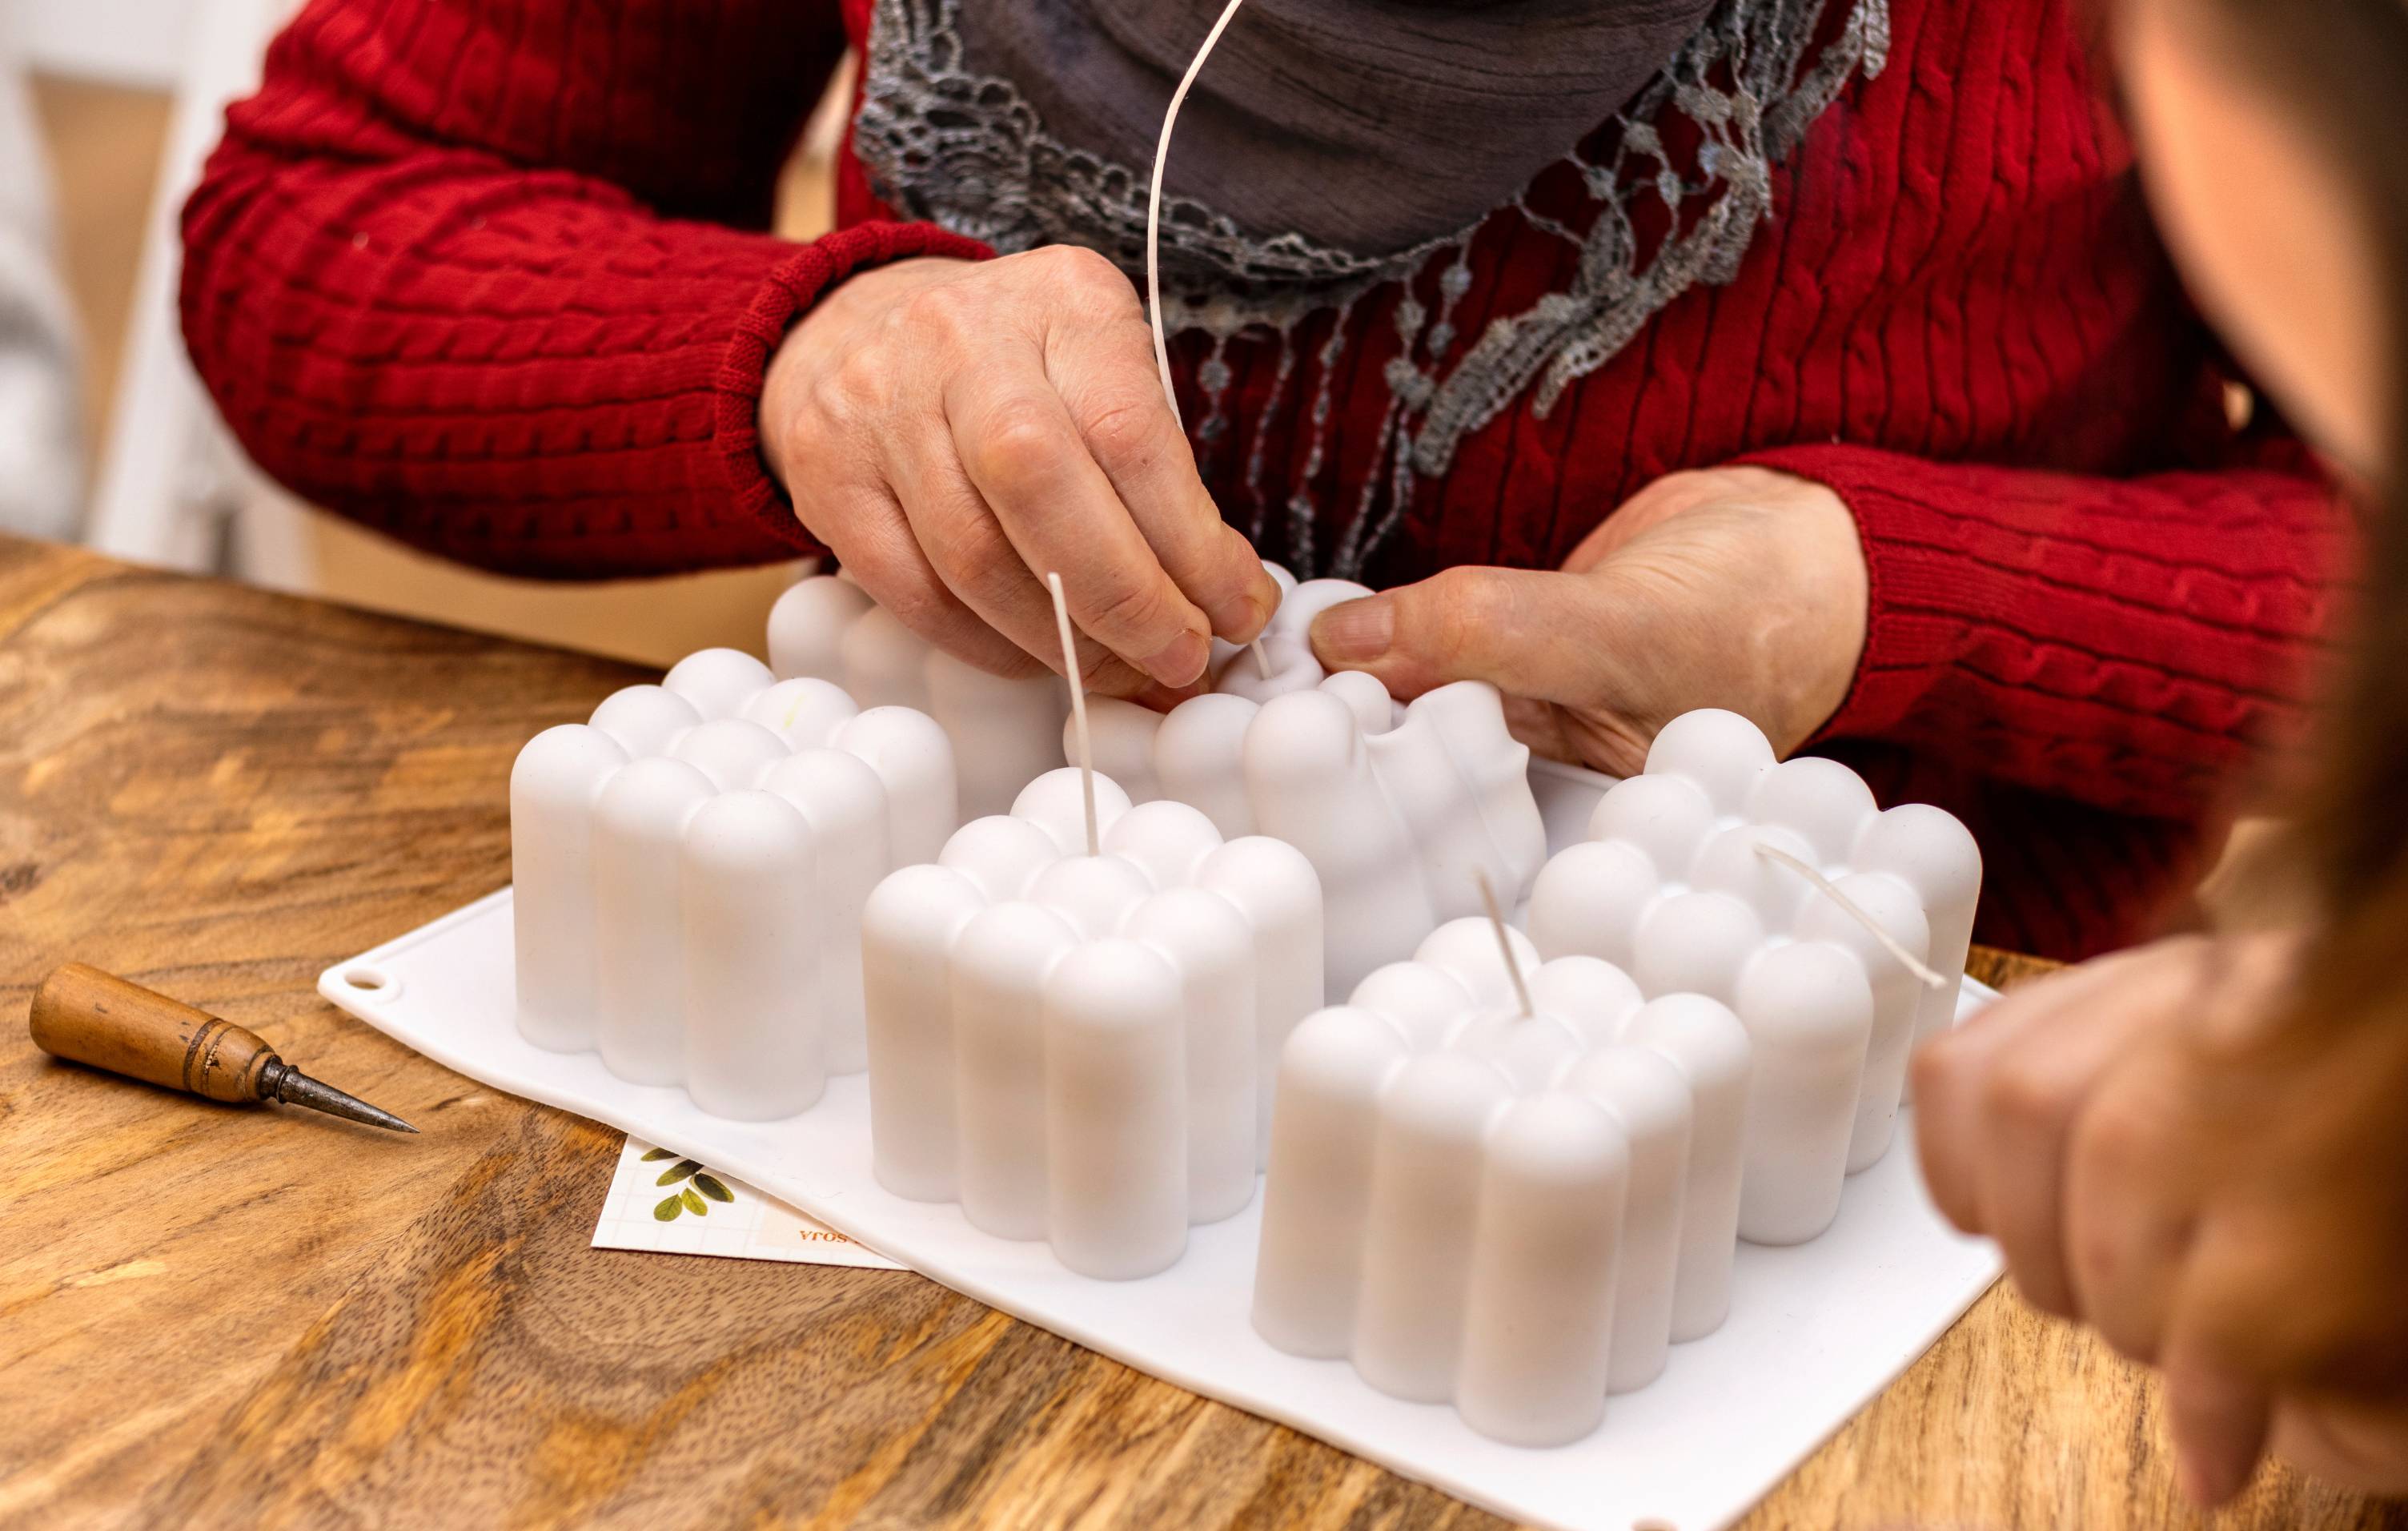
B. Setting the Wick in the Mould
The wick is the lifeline of your candle, so setting it correctly is essential. Here are techniques for different types of moulds:
- For PVC Moulds: Cut the end of the wick at an angle for easier insertion. Slide it through the pre-drilled hole in the mould, ensuring about a 2.5cm/1inch overhang at both ends. Use blu-tack to cover the wick hole to prevent leakage before pouring melted wax into the mould. Secure the wick taut and in the centre using a wick holder.
- For Silicone Moulds: Use a wicking needle to thread the wick through the mould. If there's no pre-made hole, create one at the mould's centre. Ensure the wick is placed straight, and use a wick holder to keep the wick secure and taut.
Both methods aim to keep the wick centred and straight, ensuring an even burn for your candle.
Preparing your mould correctly is a simple yet critical step in the candle-making process, setting the stage for a beautifully crafted candle.
2. Melting and Colouring the Wax
The process of melting and colouring wax is both an art and a science. Here’s how to do it right:
A. Melting the Wax
- Set Up a Double Boiler: Place a heatproof bowl or a pouring pot on top of a pot filled with a few inches of water. Ensure the bowl does not touch the water.
- Heat Gradually: Bring the water to a gentle simmer, not a boil. This indirect heat will melt the wax evenly without overheating.
- Monitor Temperature: Ideally, heat the wax to about 80°C/176°F. Use a thermometer for accuracy, especially when working with delicate waxes like soy.
B. Adding Dye
- Choosing Your Dye: You can use liquid dye or dry dye chips. Each offers different levels of control over the colour intensity.
- Add Gradually: Introduce the dye slowly into the melted wax, stirring constantly. Remember, the colour often appears darker when melted and becomes lighter as the wax solidifies.
- Experiment: The final hue can vary, so feel free to experiment. Start with a small amount of dye and increase as needed to achieve your desired shade.
Colouring your wax adds a personal touch to your candles, making them not just a source of light but a reflection of your style and creativity.
3. Adding Fragrance
Infusing your candle with fragrance is a delightful way to add a sensory dimension to your creation. Here’s how to incorporate fragrance oils effectively:
- Choosing Fragrance Oils: Opt for fragrance oils over essential oils for your candles. While essential oils are wonderful in skincare products, fragrance oils are more cost-effective and designed specifically for candle making. They also offer a wider variety of scents and better scent throw (how well the scent disperses in the air when the candle is burned).
- When to Add: Introduce the fragrance oil after melting the wax. Ensure the wax is off the heat source to prevent any degradation of the fragrance.
- Quantity Matters: A general guideline is to use about 5% fragrance oil by weight relative to the amount of wax. This ratio ensures a noticeable yet not overwhelming scent.
- Stir Well: Mix the fragrance oil thoroughly into the melted wax to ensure even distribution throughout the candle.
Adding fragrance to your candles is an excellent way to personalise them. Whether you prefer floral, woody, fruity, or any other scent, the right fragrance can turn a simple candle into a bespoke experience.
Pouring the Wax
Pouring the wax into the mould is a critical step in candle making. Here’s how to do it effectively:
- Temperature Check: Before pouring, ensure the wax is not too hot. A good pouring temperature is usually around 75°C/167°F, depending on the wax type.
- Pour Slowly: Gently pour the wax into the mould at an angle to avoid air bubbles. Air bubbles can cause imperfections in your candle.
- Fill Gradually: Fill the mould to the desired level, but avoid overfilling. If using a two-part mould, ensure the wax reaches all edges without spilling over.
- Allow to Set: Leave the mould undisturbed in a cool, dry place. Rushing this process can lead to issues like cracking or uneven setting.
Pouring the wax slowly and carefully is key to achieving a smooth, professional finish in your pillar candle.
Finishing Touches
After pouring your candle, a few final steps will ensure perfection:
- Addressing Sinkholes: As the wax cools, you might notice sinkholes forming. To fix these, reheat and pour a small amount of leftover wax into the sinkholes. This step is often necessary a few hours after the initial pour, depending on the size of your candle.
- Removing the Candle from the Mould: Once the wax has completely set (usually after 24 hours), gently remove the candle from the mould. For silicone moulds with no slits, carefully make cuts if necessary for easier removal. For PVC and metal moulds, a slight tap and squeeze might be enough to loosen the candle.
- Settling Time: Let your candle rest for about 24 hours after unmoulding. This waiting period allows the wax to fully harden and settle, ensuring stability and a clean burn.
- Trimming the Wicks: The final touch involves trimming the wick to about 0.5cm/1/4 inch. This length is ideal for ensuring a proper burn and preventing soot.
These finishing touches are vital for creating a professionally crafted candle that not only looks beautiful but also burns efficiently.
How to Take Care of Your Candle Mould
Proper care of your candle moulds is essential for their longevity and consistent performance.
Metal Moulds
- Avoid Water: Metal moulds should not be cleaned with water as it can cause rust. Instead, use a heat gun or hair dryer to melt any residual wax and then wipe it clean with a paper towel.
- Storage: Store your metal moulds in a dry place to prevent corrosion.
Silicone Moulds
- Wax Removal: Silicone moulds may develop a wax glaze over time. To clean, gently brush or, for heavy build-up, boil in water and then wipe with a soft cloth.
- Avoid Sharp Objects: Be cautious not to use sharp tools that could cut or pierce the silicone.
- Dishwasher Safe: Many high-quality silicone moulds are dishwasher safe, but check with the manufacturer first.
Regular maintenance of your moulds not only preserves their quality but also ensures the consistency of your candle making process.
Spark Your Creativity with Custom Candle Moulds
Mastering the art of putting a wick in a candle mould unlocks the door to a world of creativity and personalised home decor. Through the careful selection of materials, meticulous preparation, and detailed craftsmanship, you can transform simple wax into stunning, bespoke candles.
Now, take your candle making to the next level with a custom mould from Myka Candles and Moulds.
Choose from an array of shapes and sizes to reflect your personal style and flair. Don't wait—buy your customised candle mould now and start crafting candles that are as unique as you!
FAQs about candle moulds
What type of wax should I use for making moulded candles?
For moulded candles, it's important to use a hard wax that can hold its form while burning. Suitable options include paraffin, beeswax, palm wax, and soy wax with a minimum melting point of around 140°F.
How do I choose the right wick for my mould candle?
Choose a wick suited for the type of wax and the diameter of your candle. Wicks for free-standing candles differ from those in container candles due to the harder wax and higher melting points. Ensure the wick size is correct to avoid over-wicking or under-wicking, which can cause issues like excess melting or tunnelling.
Can I use candle melts as wax?
Yes, you can use wax melts to make candles using the double boiler method. Melt the wax melts at a specific temperature and then shape them using candle containers. These candles can burn as long as regular ones. Ensure you combine the same type of wax, such as beeswax, paraffin, or soy, for consistency.
Do you have any suggestions for stabilising the open end of the mould?
To stabilise the open end of a mould, you can warm the mould with a heat gun and then slide the candle out. Another method is to freeze the mould and candle for about 30 minutes, quickly heat the mould with a heat gun, and then try to dislodge the candle. Additionally, placing the mould in a water bath that doesn't cover the top and heating the water slowly can help loosen the candle.
How do I smooth the bottoms of the candles?
There are a couple of methods to smooth the bottoms of candles:
- Method 1: Place a cookie sheet over a pan of simmering water, stand your candle on the cookie sheet, and swirl it in a circular motion until the bottom is level. A second bottom melt may be needed to remove drips.
- Method 2: Use a flat griddle pan with holes drilled in it. Heat the griddle, place a cookie sheet underneath to catch dripping wax, stand your candle on the griddle, and melt the bottom until smooth and level.
Is there a way to remove the fragrance from the silicone mould left by the last candle I used?
To remove odours from silicone moulds, you can try the following methods:
- Baking Soda Solution: Soak the moulds in a mixture of warm water and baking soda overnight, then rinse and air dry.
- Vinegar Soak: Soak the moulds in a mixture of equal parts vinegar and water for a few hours, rinse, and air dry.
- Sunlight Exposure: Leave the moulds in direct sunlight for several hours to naturally neutralise odours.
Is there a way to prevent sinkholes in my candle moulds?
To prevent sinkholes:
- Maintain a consistent temperature in your workspace, ideally around 70°F, with good ventilation and no drafts.
- Ensure your containers or moulds are at room temperature before pouring the wax.
- Know the ideal pouring temperature for your wax type and let the wax cool to this temperature before pouring.
- To fix sinkholes, poke relief holes around the wick as the candle sets. This allows trapped air to escape and liquid wax to fill forming sinkholes. A second pour may be necessary to fill any craters formed by the first pour. If using a softer wax, you can smooth out any surface sinkholes with a heat gun or hair dryer.


